You dropped $3,200 on a power rack, $800 on bumper plates, and now you’re staring at a bare concrete floor wondering what to put under it. The garage gym flooring decision matters more than most lifters realize — not just for comfort, but for your joints, your equipment, and your concrete slab. Here’s the comparison nobody in the fitness industry gives you, because most of them are only selling one product.
The Real Costs, Square Foot by Square Foot
Before getting into the comparison, here’s what you’re actually looking at in terms of cost for a typical 2-car garage gym (400 sq ft):
| Flooring Option | Material Cost/sq ft | Install Cost/sq ft | Total for 400 sq ft |
|---|---|---|---|
| Basic rubber rolls (3/8") | $0.75–$1.25 | DIY (low) | $300–$500 |
| Rubber tiles (3/4") | $1.75–$3.00 | DIY (moderate) | $700–$1,200 |
| Professional epoxy (chip system) | $3.00–$6.00 | Included | $1,200–$2,400 |
| Stall mats (4’x6’, 3/4") | $1.00–$1.50 | DIY (easy) | $400–$600 |
| Hybrid: epoxy base + rubber zones | $3.00–$6.00 (epoxy) + $1.50–$3.00 (rubber) | Epoxy pro + DIY | $1,600–$3,200 |
Rubber Tiles: The Default Choice (and Why It’s Often Wrong)
Rubber interlocking tiles — the 24"x24" puzzle-piece style squares — are what most garage gym guides recommend as the default. They’re not wrong that rubber tiles work. They’re wrong about how much they work.
The real pros:
- Cheap and available at big-box stores
- Easy to replace individual damaged tiles
- Some cushioning for standing exercises and light lifting
- No professional installation needed
The real cons:
- They shift. Under a power rack or squat cage, the tiles migrate over time — especially if your floor is slightly uneven or you drop weight regularly. You’ll be relaying the same corner every few months.
- They trap moisture and debris underneath. Concrete can’t breathe under a solid rubber floor. Over years, mold and mildew build up in the gap between rubber and concrete.
- They look bad at 18 months. The puzzle edges fray, gaps open up where tiles separate, and the surface wears unevenly in high-traffic zones.
- They don’t anchor equipment. A power rack on rubber tiles needs to be bolted — and if you bolt through tiles, the surrounding tiles crack over time.
For a garage gym that gets heavy use — daily workouts, Olympic lifting, heavy drops — rubber tiles alone are a mediocre long-term solution.
Rubber Rolls: Better for Heavy Drop Zones
Vulcanized rubber rolls (the kind used in commercial gyms) are a step up from interlocking tiles for pure weight areas. Stall mats — 4’x6’, 3/4" thick — are the classic form, available from farm supply stores for $50–$80 each, and they’re legitimately tough.
Where rubber rolls and stall mats win:
- Weight drop zones under platforms and bumper plate areas
- Olympic lifting platforms (dedicated zones)
- 3/4" thickness absorbs drops better than 3/8" tiles
Where they fall short:
- They curl at the edges, especially in the first few months
- On a bare concrete floor, they slide under load unless anchored or butted against walls
- They cover the concrete, which means moisture trapping — and they’re heavy and annoying to move for cleaning
Epoxy: Best Base Layer, Not the Complete Solution
Here’s what the flooring industry rarely says: epoxy alone is not ideal for a heavy gym floor. That’s not an attack on epoxy — it’s just physics.
Epoxy is extremely hard. That’s great for cars, chemical resistance, and durability. For a gym, that hardness means:
- Joint stress when standing for long workouts (zero cushioning)
- Surface cracking under repeated heavy weight drops — a 200-pound deadlift dropped from lockout height generates significant impact force
- Cosmetic damage (pitting) in drop zones over time
But here’s where epoxy earns its place in a garage gym: as the base.
A properly coated epoxy floor under a rubber overlay gives you the best of both systems. The epoxy seals the concrete (no moisture, no dust, easy to clean around rubber pieces), provides structural support that rubber alone can’t, and keeps the floor looking maintained in the non-gym areas. The rubber overlay handles the impact zones where you need it.
Weight Drop Tolerance: The Number That Matters
How much impact can each system handle before showing visible damage?
Epoxy alone (3-coat system): Handles weight drops up to about 50–75 lbs consistently without pitting. Heavier drops will create cosmetic impact marks over time. Functional, but not ideal if you’re regularly dropping 200+ lbs.
3/8" rubber rolls over epoxy: Handles moderate drops (100 lbs) reasonably well. Still not enough for serious Olympic lifting.
3/4" rubber (stall mats or tiles) over epoxy: This is the appropriate surface for heavy drops. Rated by most gym equipment manufacturers for bumper plate drops from full extension. Absorbs the impact force adequately for residential use.
Dedicated lifting platforms (4"+ rubber + plywood): Required for competitive-grade Olympic lifting. Not necessary for most home gym users.
Comfort for Long Workouts
This matters for anyone doing standing cardio, stretching, or long training sessions:
Epoxy alone: Like standing on concrete. Fine for 30-minute sessions. Fatiguing for longer workouts.
3/8" rubber: Noticeable improvement. Reasonable for most users.
3/4" rubber: Significant improvement. Most trainers and gym owners specify 3/4" minimum for standing areas.
Anti-fatigue mat over epoxy: For a dedicated standing work zone (if your garage doubles as a workshop), a standalone anti-fatigue mat over epoxy is cheaper than full rubber coverage and just as effective for that zone.
What to Do for Different Garage Gym Configurations
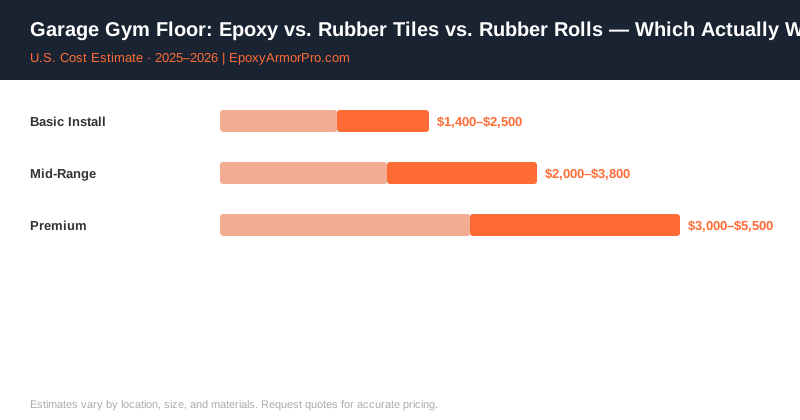
Power lifting focus (squats, bench, deadlift): Epoxy throughout + 3/4" stall mats in the lifting area. Budget $1,800–$2,800.
Olympic lifting focus (cleans, snatches): Epoxy throughout + dedicated platform with plywood and rubber construction in the pull zone. Budget $2,000–$3,500.
General fitness (cardio + weights): Epoxy throughout + 3/8" rubber rolls over the weight area. Most cost-effective setup. Budget $1,400–$2,200.
Cardio-only (treadmill, bike, rower): Epoxy alone is excellent. Non-slip topcoat finish. Budget $1,200–$2,000.
For comparison between epoxy and other flooring alternatives, see our epoxy vs. rubber flooring guide for more head-to-head detail, and our garage epoxy flooring guide for full coating system options.
Contractor Referral Disclaimer: EpoxyArmorPro is a contractor referral and cost information service, not a licensed flooring contractor. We connect consumers with independent, licensed, and insured contractors. We do not perform any flooring work directly. Cost estimates are averages based on market data and vary by location, project size, materials, and contractor. Always verify contractor licensing and insurance before hiring. Individual quotes may differ from estimates shown.