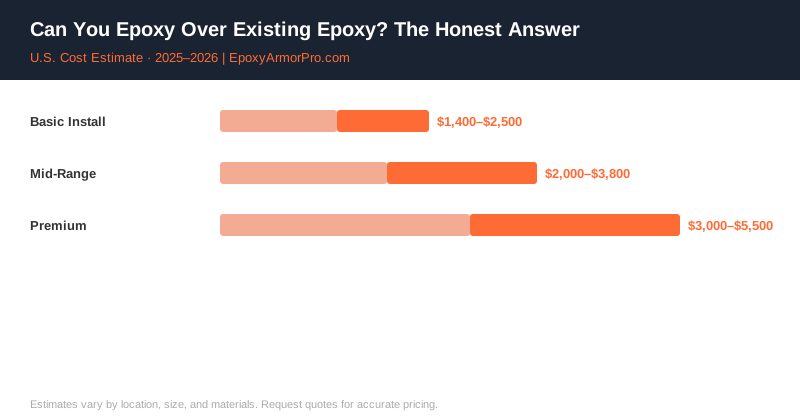
42% of homeowners who call a contractor about a “new” epoxy floor already have epoxy down. The existing coat is peeling, faded, or just tired-looking — and the question is always the same: do we have to remove it, or can we go right over it?
The honest answer is: it depends on the condition of what’s there. Sometimes you can overlay and save $500–$1,000. Sometimes overlaying is the worst thing you can do, and it’ll cost you twice as much when the new coat fails 8 months later. Here’s how to tell the difference.
The Adhesion Test: The Only Thing That Actually Matters
Before any coating goes over existing epoxy, a competent contractor performs an adhesion test. It’s simple, fast, and tells you everything.
The pull-off method: A metal dolly is bonded to the existing coating, then pulled with a calibrated gauge. If the existing coat holds above 200–250 psi (the standard threshold for overlay suitability), you can coat over it. If it pulls off the concrete below that threshold, removal is the only responsible path forward.
The scratch test: Less precise, but useful as a field check. Drag a coin or a key across the surface with firm pressure. If the existing coat powders, flakes, or comes off in chips, it’s failed adhesion. If it scratches cleanly without lifting, the bond to the concrete is still intact.
The tape test: Press 2-inch painter’s tape firmly onto the surface, let it sit for 60 seconds, then rip it off fast. If the existing coating lifts with the tape, it’s delaminating from the concrete. If the tape peels cleanly, the coat is still bonded.
A contractor who wants to skip these tests and just sand-scuff the existing coat and recoat is either cutting corners or doesn’t know what they’re doing. The test takes 20 minutes and costs nothing. The failure from skipping it costs thousands.
When Overlay Works: The Surface Prep Requirements
Assuming the adhesion test passes, here’s what has to happen before new epoxy goes down over old:
Mechanical abrasion. Existing epoxy is too smooth for new epoxy to bond to without prep. Contractors use either diamond grinding or shot blasting to create a surface profile — a slightly rough texture that new coating can key into. Without this step, you’re relying on a purely chemical bond between two incompatible resins, which will fail.
Degreasing. Any oil, silicone, or wax contamination on the old coat will prevent bonding. A thorough degreasing with a TSP substitute or similar product, followed by a water rinse and full dry, is required.
Edge feathering. If the old coat has any lifted edges — even minor ones — they must be ground flush. Any raised edge on the old coat becomes a stress riser under the new coat and will cause peeling to propagate.
Spot repairs. Areas of actual delamination need to be ground back to bare concrete before the new coat goes over the rest of the floor. You can’t just fill over them.
When You Must Remove the Existing Coat
Some conditions make overlay the wrong choice regardless of how good the adhesion test looks elsewhere:
Widespread peeling or bubbling. If more than 15–20% of the floor shows delamination, the remaining bonded areas are likely also compromised. Full removal is cheaper in the long run than patching, overlaying, and dealing with progressive failure.
Moisture-related failure. If the original coat failed because of moisture vapor pushing up through the concrete, overlaying with a standard epoxy product will fail for the same reason. You need bare concrete, moisture testing, and a vapor barrier primer system. See our guide on epoxy after flooding for more on moisture-related failures.
Unknown coating type. If you don’t know what’s on the floor — or if the existing coat appears to be a polyurethane or alkyd “garage paint” rather than true epoxy — adhesion testing becomes critical because these products have different chemistry. Some don’t accept overcoats well at all.
High total thickness. If the existing floor already has multiple layers (original epoxy + a previous overcoat), adding another layer may push the total thickness to a point where edge chipping becomes a chronic problem. Grind back and start fresh.
Cost Comparison: Overlay vs. Full Removal
| Approach | Prep Cost | Material + Labor | Total (2-car garage, 400 sq ft) |
|---|---|---|---|
| Overlay (over bonded coat) | $100–$300 (abrasion, degrease) | $800–$1,800 | $1,000–$2,100 |
| Partial removal + overlay | $300–$700 (grinding failed areas) | $1,000–$2,000 | $1,300–$2,700 |
| Full removal + new system | $500–$1,200 (full grind/blast) | $1,200–$2,500 | $1,700–$3,700 |
The overlay route saves $700–$1,600 compared to full removal — when it’s appropriate. When it’s not appropriate and you do it anyway, you’re looking at a failed floor within 12–18 months, which means paying the full removal cost plus a full new install anyway.
Choosing the Right Topcoat for an Overlay
One advantage of overlaying over existing epoxy is that you don’t necessarily need to apply a full new base coat. Depending on the condition of the old floor, a polyurea or polyaspartic topcoat may be all you need — it bonds over properly prepped epoxy, has excellent UV and abrasion resistance, and cures faster than a full epoxy system.
Polyurea and polyaspartic topcoats run $1.50–$4.00 per square foot installed over existing epoxy, versus $3.00–$7.00 for a full new epoxy system. For a floor where the old coat is still bonded but just worn and faded, a topcoat-only overlay is often the most cost-effective approach.
The DIY Reality
Overlaying existing epoxy is a reasonable DIY project if the adhesion test passes and the floor is in reasonably good condition. The key step most DIYers skip is the mechanical abrasion — you can’t just wipe it down and roll on new product. You need to rent a floor grinder or use 80-grit sandpaper in an orbital sander to create the surface profile. Without that step, the new coat will lift in high-traffic areas within months.
For a floor that’s borderline — some good areas, some questionable — the professional route is worth the cost. A contractor who tests, preps correctly, and warranties the work protects you from the failure scenario. For more on the cost-benefit of professional vs. DIY, see our DIY vs. professional epoxy comparison.
Contractor Referral Disclaimer: EpoxyArmorPro is a contractor referral and cost information service, not a licensed flooring contractor. We connect consumers with independent, licensed, and insured contractors. We do not perform any flooring work directly. Cost estimates are averages based on market data and vary by location, project size, materials, and contractor. Always verify contractor licensing and insurance before hiring. Individual quotes may differ from estimates shown.