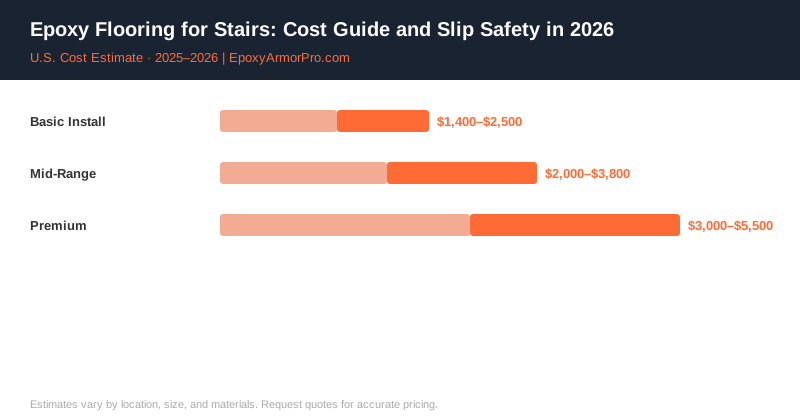
Most homeowners assume coating a staircase costs about the same per square foot as coating a garage floor. It doesn’t — and the reason isn’t the epoxy itself, it’s the nosing.
Stair nosing, the leading edge of each step, is the single most safety-critical few inches of any flooring surface in a house. It’s also the hardest part to coat properly, because it needs a sharply defined anti-slip strip that’s visible in low light and grippy even when wet, applied precisely along a curved or beveled edge rather than a flat plane.
Why Stairs Cost More Per Square Foot Than Floors
| Project | Cost | Notes |
|---|---|---|
| Per step (standard width, epoxy + anti-slip nosing) | $30–$50 | Interior stairs, good condition |
| Per step (with crack/chip repair) | $45–$75 | Concrete or masonry stairs needing prep |
| Full basement stairway (12–14 steps) | $400–$900 | Interior, low traffic |
| Full exterior concrete stairway (12–14 steps) | $600–$1,200 | UV-stable topcoat required |
| Anti-slip nosing strip only (retrofit onto existing coating) | $15–$25 per step | Add-on safety upgrade |
The labor time per square foot on a staircase is significantly higher than an open floor — each step requires careful masking, precise nosing application, and more drying/cure management between steps to keep the stairway usable in stages. A contractor moves much faster coating 400 square feet of open garage floor than 400 square feet spread across 14 individual steps.
The Nosing Is Not Optional
Stair nosing failure — a worn, smooth edge on a step — is a well-documented cause of fall injuries in both residential and commercial settings. The National Floor Safety Institute has identified stairways and their leading edges as a disproportionate source of slip-and-fall incidents relative to flat flooring. An epoxy coating without a distinct anti-slip nosing strip on each step is, functionally, decorative only — it doesn’t address the actual safety risk stairs present.
Exterior Stairs Add UV and Weather Considerations
Exterior concrete stairs face the same UV exposure and freeze-thaw cycling as any outdoor epoxy application, which means the topcoat needs to be UV-stable (standard epoxy yellows and chalks under sun exposure) and the whole system needs to tolerate water freezing in any surface pores. A polyaspartic or polyurethane topcoat, rather than standard epoxy, is the typical spec for exterior stairs for this reason — and it adds cost accordingly.
Sequencing the Work So Stairs Stay Usable
A full staircase can’t be coated all at once if it’s the only way to access a level of the house — someone needs to get up and down during the project. Experienced contractors typically coat every other step first, let it cure enough for careful foot traffic, then coat the remaining steps, keeping a usable (if slightly awkward) path throughout the process. This adds a day or so to the timeline but avoids stranding residents on one floor for the full cure period.
What to Ask Your Contractor
- What anti-slip nosing product are you using, and is it a distinct contrasting color?
- Is the topcoat UV-stable if this is an exterior stairway?
- How will you sequence the work so the stairs stay passable during the project?
- What’s the full cure time before normal traffic, and before heavier use?
- Do you offer a nosing-only retrofit if my existing stair coating just needs an upgrade?
Contractor Referral Disclaimer: EpoxyArmorPro is a contractor referral and cost information service, not a licensed flooring contractor. We connect consumers with independent, licensed, and insured contractors. We do not perform any flooring work directly. Cost estimates are averages based on market data and vary by location, project size, materials, and contractor. Always verify contractor licensing and insurance before hiring. Individual quotes may differ from estimates shown.