In 2023, water damage from washing machine leaks and overflows was among the top 10 homeowner insurance claims in the US, averaging $11,000 per incident according to the Insurance Information Institute. Your laundry room floor is directly in the path of that risk. Most laundry rooms have bare vinyl, cracked tile, or painted concrete that won’t contain a leak — it’ll just route it under the appliances and into the subfloor.
Epoxy isn’t a substitute for a properly working washing machine, but a sealed, waterproof laundry room floor is your last line of defense. Here’s what the installation involves, what it actually costs, and what questions to ask a contractor.
Why Laundry Rooms Specifically Benefit From Epoxy
Laundry rooms see a combination of hazards that most other residential spaces don’t:
Moisture and water: Overflows, condensation from hot cycles, humidity from steam, and the constant proximity of the drain — water contact is expected, not exceptional.
Chemical exposure: Detergents, bleach, fabric softeners, and stain removers all end up on the floor at some point. Some concentrated detergents can etch or stain unprotected concrete. Bleach is surprisingly aggressive on bare concrete over time.
Temperature cycling: The space heats up during hot cycles and cools between uses. In basement laundry rooms, winter cold adds to this cycling.
A properly installed 100% solids epoxy system handles all three. It creates a chemically resistant, waterproof surface that you can mop up spills from immediately without worrying about penetration or staining.
Moisture Vapor Barriers: What They Do and When You Need One
Here’s the thing most homeowners don’t know: epoxy itself is waterproof from above, but it’s not impervious to moisture coming up from below. Concrete is porous. In basements and on-grade slabs, moisture vapor migrates upward continuously. If the vapor emission rate is too high, it gets trapped under the epoxy, creating hydrostatic pressure that pushes the coating off the slab.
This is called delamination from moisture vapor emission, and it’s one of the most common epoxy failure modes in basement laundry rooms. The coating looks fine for 6–18 months, then bubbles and peels from below.
The solution is a moisture vapor barrier (MVB) primer — a specialized epoxy primer formulated to block vapor transmission. It goes down first, before the color coat, and bridges the gap between the damp slab and the coating system above.
How do you know if you need one? Testing. A calcium chloride test (ASTM F1869) measures vapor emission over 72 hours. Results above 3 lbs per 1,000 sq ft per 24 hours are the trigger point for MVB primer. Testing kits cost $25–$50 at flooring supply houses, or your contractor should do it as part of their assessment.
MVB primer adds $0.50–$1.25 per square foot to the project. In a 60–100 sq ft laundry room, that’s $30–$125 — a trivial cost versus a failed floor 18 months later.
Can Epoxy Go Over Existing Tile?
This is the most common question contractors get for laundry room projects. The short answer: sometimes yes, but with conditions.
When over-tile epoxy works:
- All tiles are firmly bonded — zero hollow spots when tap-tested
- Tiles aren’t cracked or chipped
- Grout lines are tight and not crumbling
- Tile surface can be mechanically abraded for adhesion
The installation process over tile:
- Tap-test every tile — any hollow spot means a loose tile that will eventually fail and take the coating with it
- Grind or sand-blast the tile surface to create a mechanical profile
- Apply an epoxy skim coat to fill grout lines and level the surface
- Apply the full color coat and topcoat system
The skim coat step adds $0.75–$1.50 per square foot. On a 60 sq ft laundry room, that’s $45–$90 — often worth skipping tile removal hassle in a small space.
When to remove tile first:
- More than 10% of tiles are hollow or loose
- Tiles are significantly cracked
- There’s evidence of water damage beneath the tile
- Tiles are very thick (3/8"+) and stacking the epoxy system on top would create a height difference at doorways
In those cases, tile removal and disposal adds $1–$3 per square foot, but provides a better substrate for a lasting installation.
What Laundry Room Epoxy Actually Costs
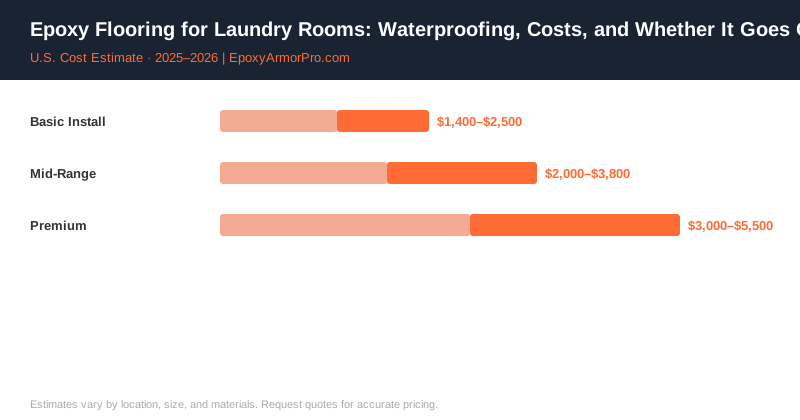
Laundry rooms are typically 40–120 sq ft. That’s small enough that mobilization costs — getting a contractor to your home, setting up equipment, prep time — represent a significant fraction of the total job.
According to the Concrete Network, small residential spaces like laundry rooms typically run $5–$9 per square foot installed when priced on their own, because of the minimum mobilization overhead. Combining the laundry room project with an adjacent basement area or utility space often drops the per-foot cost considerably.
| Project Scope | Estimated Cost | Notes |
|---|---|---|
| Laundry room only (60 sq ft) | $400–$700 | Minimum mobilization applies |
| Laundry room only (100 sq ft) | $600–$900 | Standard 2-coat system |
| Laundry + adjacent utility (200 sq ft) | $800–$1,600 | Better per-foot cost |
| Over tile (add per sq ft) | +$0.75–$1.50 | Skim coat to fill grout lines |
| Moisture vapor barrier primer (add) | +$0.50–$1.25 per sq ft | Required in many basements |
| Slope correction overlay | +$1–$2 per sq ft | If floor doesn’t drain properly |
Installation Timing and Appliance Movement
The logistics of laundry room epoxy are simple but require some planning:
Appliance removal: The washer and dryer need to come out entirely — not just pulled forward. Most contractors include this in their scope; confirm before signing.
Water line disconnect: The contractor will need the water supply valve off before moving the washer. This is typically a 5-minute task with the right tool, but note it so it doesn’t become a delay on installation day.
Cure time before reinstalling: Standard epoxy is typically ready for foot traffic in 24 hours and appliance reinstallation in 72 hours. A fast-cure polyaspartic system can compress this to 24 hours total. For homeowners who can’t be without laundry for multiple days, the polyaspartic premium (typically 20–30% higher) is often worth it.
Design Options for a Small Space
Laundry rooms don’t have to be utilitarian. Common finishes that look great in small spaces:
- Light solid colors (light grey, white, warm beige): Makes a small space feel larger, easier to see dirt and lint
- Flake broadcast in grey/white blend: Masks scuffs and worn areas from appliance vibration
- Gloss topcoat: Reflects light in what’s often a windowless space, brightens the room significantly
- Matte topcoat: Hides water spots and soap drips better — practical for the use case
For basement laundry rooms adjacent to other finished areas, match the floor color to the broader basement space if they’re being coated together — it creates visual continuity and is easier to price as a combined project.
Contractor Referral Disclaimer: EpoxyArmorPro is a contractor referral and cost information service, not a licensed flooring contractor. We connect consumers with independent, licensed, and insured contractors. We do not perform any flooring work directly. Cost estimates are averages based on market data and vary by location, project size, materials, and contractor. Always verify contractor licensing and insurance before hiring. Individual quotes may differ from estimates shown.