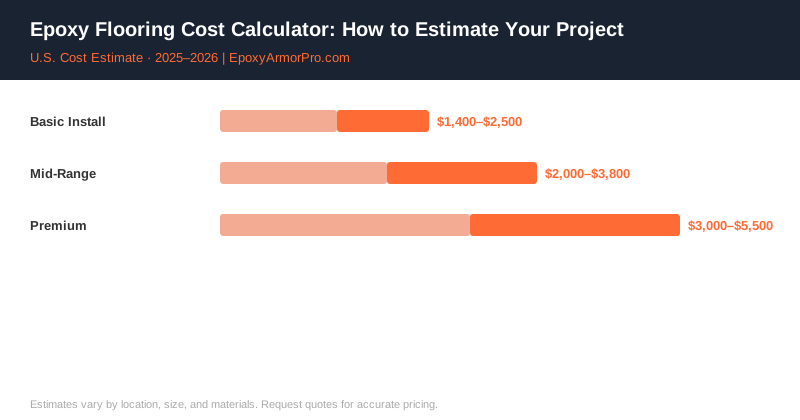
What’s your garage floor going to cost? You can get a rough answer right now — before calling a single contractor — using a straightforward formula. It won’t replace an in-person quote, but it’ll tell you whether a $900 bid is suspiciously low or whether $3,500 is reasonable for your market. That’s worth knowing before anyone shows up with a sample board.
Here’s the full calculation, broken into steps.
The Formula
Total Project Cost = (Square Footage × Base Rate) × Prep Multiplier × Regional Multiplier
Each variable adjusts for the real factors that drive cost. Work through each step with your actual numbers.
Step 1: Measure Your Floor
Measure length × width for each room you’re coating. If the space is irregular, break it into rectangles and add them up.
Standard room sizes for reference:
| Space | Typical Dimensions | Square Footage |
|---|---|---|
| Single-car garage | 12×20 ft | 240 sq ft |
| Two-car garage | 20×24 ft | 480 sq ft |
| Three-car garage | 30×22 ft | 660 sq ft |
| Standard basement | 24×30 ft | 720 sq ft |
| Large basement | 40×30 ft | 1,200 sq ft |
| Laundry room | 10×12 ft | 120 sq ft |
| Workshop | 16×20 ft | 320 sq ft |
Subtract fixed obstacles: floor drains, support columns, and built-in features that won’t be coated. A central column takes up about 4–9 square feet. A floor drain surrounded by its drain area subtracts negligibly (2–3 sq ft) but creates an edgework complication.
Add 5% buffer: coatings need to run under baseboards and into tight corners. Your working area is always slightly larger than your measured area.
Step 2: Choose Your Base Rate
The system you choose drives the base cost more than any other single factor:
| System Type | Base Rate (Installed) | What You Get |
|---|---|---|
| Basic solid-color (pro) | $2.00–$3.00/sq ft | Single color, no flakes, 2-coat system |
| Chip/flake standard (pro) | $3.00–$4.50/sq ft | Color flakes, polyaspartic topcoat, 3–4 coat |
| Chip/flake premium (pro) | $4.50–$6.00/sq ft | Premium brand materials, thick build, 10-yr warranty |
| Metallic decorative | $6.00–$10.00/sq ft | Swirled metallic effects, unique finish |
| DIY pro-grade materials | $1.50–$2.50/sq ft | Your labor, professional materials |
| DIY big-box kit | $0.50–$0.75/sq ft | Your labor, consumer-grade materials |
For most homeowners who want their floor to look good for 15+ years without DIY risk, chip/flake standard at $3.00–$4.50/sq ft is the right base rate.
Step 3: Apply the Prep Multiplier
Surface condition is the most variable cost factor. Assess your floor honestly:
| Floor Condition | Prep Multiplier | What It Means |
|---|---|---|
| New concrete, clean | ×1.0 | Standard grind-and-coat only |
| Light wear, minor cracks | ×1.1 | Small crack fills, standard grind |
| Moderate wear, multiple cracks | ×1.2 | Significant crack repair, possible joint fill |
| Old paint or sealer present | ×1.2–1.3 | Existing coating must be removed first |
| Moisture problems (below grade) | ×1.3–1.5 | Moisture barrier coat required |
| Major spalling or damage | ×1.4–1.6 | Extensive concrete repair before coating |
If your basement is below grade and has ever shown moisture or efflorescence staining on the walls, use at minimum a ×1.3 multiplier. For a detailed look at how moisture affects basement projects, see basement epoxy flooring cost.
Step 4: Apply the Regional Multiplier
Labor costs vary significantly by market. These multipliers adjust for your metro area:
| Region | Regional Multiplier |
|---|---|
| New York City, San Francisco, Boston | ×1.4–1.6 |
| Los Angeles, Seattle, Washington DC | ×1.3–1.5 |
| Chicago, Denver, Minneapolis | ×1.1–1.3 |
| Atlanta, Houston, Dallas | ×1.0–1.2 |
| Phoenix, Las Vegas, Nashville | ×0.9–1.1 |
| Rural / small markets | ×0.8–1.0 |
National average = ×1.0. If you’re in the Northeast or West Coast, expect to pay 30–50% more than the national base rates.
Step 5: Calculate Your Range
Formula: Square Footage × Base Rate Range × Prep Multiplier × Regional Multiplier
Example: Standard two-car garage in Atlanta
- Square footage: 480 sq ft
- System: chip/flake standard ($3.00–$4.50/sq ft)
- Floor condition: light wear, one crack (×1.1)
- Region: Atlanta (×1.1)
Low end: 480 × $3.00 × 1.1 × 1.1 = $1,742
High end: 480 × $4.50 × 1.1 × 1.1 = $2,613
Realistic budget range: $1,750–$2,600
Example: Large basement in Boston with moisture issues
- Square footage: 1,000 sq ft
- System: chip/flake standard
- Floor condition: below-grade moisture (×1.4)
- Region: Boston (×1.5)
Low end: 1,000 × $3.00 × 1.4 × 1.5 = $6,300
High end: 1,000 × $4.50 × 1.4 × 1.5 = $9,450
Realistic budget range: $6,300–$9,500
Using Your Estimate When Getting Quotes
Your calculated range serves two purposes:
Filtering lowball bids. If your formula gives $1,750–$2,600 and a contractor quotes $900, that’s not a deal — it’s a warning. At that price, they’re either skipping diamond grinding or using consumer-grade materials. For context on why low bids are dangerous, see cheap epoxy floor coating.
Identifying inflated bids. If three quotes cluster around $2,200 and a fourth is $4,000, your formula tells you whether that premium is justified or unexplained. Sometimes it’s premium materials — ask for the product spec sheet. Sometimes it’s simply high margin.
Quick-Reference Cost Table
For fast estimates without running the full formula:
| Space | Budget System | Standard System | Premium System |
|---|---|---|---|
| Single-car garage (240 sq ft) | $480–$720 | $720–$1,080 | $1,080–$1,440 |
| Two-car garage (480 sq ft) | $960–$1,440 | $1,440–$2,160 | $2,160–$2,880 |
| Three-car garage (660 sq ft) | $1,320–$1,980 | $1,980–$2,970 | $2,970–$3,960 |
| Standard basement (720 sq ft) | $1,440–$2,160 | $2,160–$3,240 | $3,240–$4,320 |
| Large basement (1,200 sq ft) | $2,400–$3,600 | $3,600–$5,400 | $5,400–$7,200 |
These are national average ranges at ×1.0 regional multiplier, ×1.0 prep multiplier. Adjust as needed.
Beyond the Numbers
The formula gives you a range. What it can’t tell you is whether the contractor is any good. Before signing, always ask:
- What grinding equipment do you use? (Should mention diamond tooling)
- What’s the solids content of your base coat product? (Should be 85–100%)
- Do you test for moisture vapor emission? (Should be yes)
- What does your warranty cover and for how long? (Should be 5–10 years minimum)
For a complete breakdown of what those answers should look like, the epoxy flooring labor cost guide walks through exactly what legitimate installation includes.
Contractor Referral Disclaimer: EpoxyArmorPro is a contractor referral and cost information service, not a licensed flooring contractor. We connect consumers with independent, licensed, and insured contractors. We do not perform any flooring work directly. Cost estimates are averages based on market data and vary by location, project size, materials, and contractor. Always verify contractor licensing and insurance before hiring. Individual quotes may differ from estimates shown.