Most people use “peeling” and “delamination” interchangeably when their epoxy floor is failing. They’re not the same thing — and the distinction matters a lot when you’re deciding how to fix it.
Peeling is a surface problem. Delamination is a bond failure. Same visible result (epoxy coming off the floor), completely different root cause and repair approach. Getting the diagnosis wrong means spending money on a fix that fails again.
Peeling vs Delamination: The Real Difference
Peeling typically refers to the top layer of a multi-coat system separating from the layer beneath it — clear topcoat peeling from the color base, for instance, or a recoat layer separating from the original coat. It’s an intercoat adhesion failure. The epoxy system is separating from itself.
Delamination is when the entire coating system separates from the concrete substrate at the concrete/epoxy interface. The coating comes off as a more-or-less intact sheet, with the concrete surface below showing little or no epoxy residue. This is a substrate adhesion failure.
The distinction affects everything:
- Peeling between layers → may be patchable if the substrate bond is still good
- True delamination → requires full removal, no overlay will hold
According to the International Concrete Repair Institute, delamination at the substrate interface accounts for approximately 60% of all professional floor coating failures in commercial settings — and the leading causes are nearly always preparation-related.
What Causes True Delamination
1. Concrete Surface Laitance
Laitance is the weak layer of cement paste and fines that forms on the surface of concrete as it cures. It’s soft, dusting, and has terrible tensile strength. If the concrete surface wasn’t ground down past the laitance layer before coating, the epoxy bonded to the laitance — not to the actual concrete. When stress hits the coating (thermal cycling, vehicle traffic, moisture), the laitance shears, and the coating lifts as a unit.
This is the most common delamination cause. A proper CSP 3–4 grind is the only fix — acid etching doesn’t reliably remove laitance.
2. Moisture Vapor Emission (MVE) Exceeding Coating Limits
As described in our epoxy floor moisture issues guide, moisture vapor pushing up through a slab creates pressure that literally detaches the coating from below. Delamination from moisture has a distinctive signature: the underside of the delaminated sheet is slightly damp or shows white crystalline efflorescence.
3. Coating Applied Over Contaminated Concrete
Concrete contaminated with oil, curing compounds, form-release agents, or chemical residue acts as a release agent — the epoxy bonds to the contaminant rather than the concrete, and the whole system eventually lifts as one piece.
New construction concrete often has curing compounds applied (to slow evaporation during the cure). These must be mechanically removed before coating. They’re invisible but they’re there.
4. Wrong Primer for the Substrate
Some concrete types — lightweight concrete, cellular concrete, very high-porosity slabs — need a penetrating primer formulated specifically for their characteristics. Using a standard primer on incompatible substrate creates a weak interface. The coating sits on top of a film that was never well-integrated with the concrete.
5. Coating Over Green Concrete
Freshly poured concrete that hasn’t reached full compressive strength is still outgassing CO2 and water vapor. Coating it too soon — before 28 days at minimum, 60 days for moisture-sensitive coatings — guarantees eventual delamination. The vapor emission rate is too high, and the surface chemistry is still changing.
How to Test Adhesion Before Deciding on Repair
Before committing to a repair scope, test adhesion in multiple areas to understand how widespread the delamination actually is.
Knock test: Described above. Fast, free, gives you a rough map of good vs hollow areas.
Dollar-bill tape test: Press a piece of high-quality duct tape firmly to the floor, rubbing out any air bubbles. Rip it off quickly at 90 degrees. If it pulls up any epoxy, the adhesion in that spot is compromised.
Knife test: Slide a utility knife blade at a shallow angle under the coating edge. If the blade slides under easily with minimal resistance for more than 1–2 inches, the coating isn’t bonded. If it binds and requires force to move, the bond is good.
Pull-off test (professional): A contractor using a dolly adhesion tester (per ASTM D4541) can give you actual PSI numbers. Epoxy systems should achieve 200+ PSI pull-off strength. Below 100 PSI is a failing bond.
Full Removal vs Overlay: Which Is Right?
Once you know the extent of delamination, you have two options:
Full removal (diamond grinding): Removes all existing coating back to bare concrete. Allows proper diagnosis of concrete conditions, fresh moisture testing, crack repair, and complete control of the new system’s specifications. Required when delamination is widespread, moisture is the cause, or the concrete surface needs significant remediation. Cost: $1–$3/sq ft for removal alone.
Overlay (coat over): Only appropriate when delamination is isolated (under 15% of floor), the substrate bond is otherwise sound, and the root cause was a localized contamination rather than a systemic prep failure. Process: grind out the delaminated sections, prime those areas with a compatible bonding primer, feather in new coating. Cost: $2–$4/sq ft.
The honest truth: contractors who push overlays over widespread delamination are usually trying to save time and money on their end, not yours. If the knock test shows more than 20–30% of the floor with hollow areas, full removal is almost always the right call.
| Delamination Scope | Recommended Approach | Typical Cost (400 sq ft) |
|---|---|---|
| Isolated spots (under 10% of floor) | Spot grind + spot prime + patch | $300–$800 |
| Moderate (10–30% of floor) | Assess per-spot vs full removal | $800–$2,000 |
| Widespread (over 30% of floor) | Full diamond grinding removal | $1,200–$3,500 |
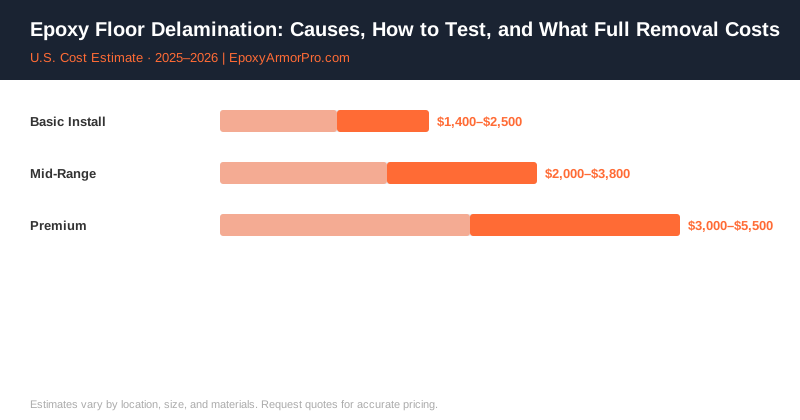
| Full removal + new 3-coat system | Proper redo with moisture test | $2,000–$4,500 |
Getting It Right on the Second Try
The repair process needs to address the root cause, not just the symptom. That means:
- Full removal via diamond grinding (see our complete removal guide)
- Moisture testing per ASTM F1869 or F2170 before any new coating
- Moisture mitigation primer if readings are elevated
- Crack repair on any cracks exposed during removal
- Proper 100% solids epoxy system with aliphatic topcoat
Shortcuts at any of these steps set up the next system for the same failure. For a floor that’s already failed once, this is the non-negotiable minimum for a result that holds.
If you’re weighing whether to DIY the repair or hire a professional — given that full removal requires industrial diamond grinding equipment — read our DIY vs professional comparison for an honest assessment.
Contractor Referral Disclaimer: EpoxyArmorPro is a contractor referral and cost information service, not a licensed flooring contractor. We connect consumers with independent, licensed, and insured contractors. We do not perform any flooring work directly. Cost estimates are averages based on market data and vary by location, project size, materials, and contractor. Always verify contractor licensing and insurance before hiring. Individual quotes may differ from estimates shown.